README Score Checker: Rate Your GitHub README and Fix What's Missing
You just spent days, weeks, or even months building an incredible open-source project. The code is clean, the features work perfectly, and you are ready to share it with the world. But when someone visits your GitHub repository, what do they see? If they are greeted by a blank page or a single confusing sentence, they will leave within seconds. That is why your README is the most important file you will ever write.
How to Know If Your README Is Good Enough
Many developers struggle with a common problem: "I wrote a README, but I have no idea if it is missing anything." When you stare at your own code for weeks, it becomes impossible to analyze your documentation objectively. You might ask yourself:
- Did I include all the sections my users need?
- Does my existing README have any critical missing information?
- Do I need a "Screenshots" section, or is a "Usage" section enough for my specific project type?
Example: Imagine you built a brilliant NPM package. You wrote a quick description and pushed it to GitHub. But you forgot to include an "Installation" command or "Usage" examples. A visitor lands on your repo, cannot figure out how to import your package within 10 seconds, and leaves.
How this tool helps: Our README Score Checker instantly solves this blind spot. Instead of guessing, you paste your text into the checker, select "NPM Package", and the tool instantly tells you: "Your score is 60/100. You are missing the 'Installation' and 'Usage' sections!" It acts as an automated editor, giving you a clear roadmap to turn a confusing repository into a professional, welcoming project. If you discover you are missing several sections and don't want to write the Markdown from scratch, you can always jump over to our readme generator github to generate them with one click.
What is a GitHub README and Why Does it Matter?
A GitHub README is the front page of your repository. It is the very first thing visitors see when they open your project. Having a high-quality README provides massive benefits to you and your users:
- First Impressions Matter: A great README instantly builds trust. It shows that you care about your work and respect the time of the people trying to use it.
- Boosts Open Source Contributions: Nobody wants to contribute to a project they cannot understand. Clear setup instructions and contributing guidelines drastically lower the barrier to entry for new developers.
- Increases GitHub Stars and Traffic: Projects with excellent documentation are shared more often on sites like Hacker News, Reddit, and Twitter. More visibility means more stars and a larger community.
- Stands Out to Hiring Managers: If you are applying for software engineering jobs, your GitHub profile is your resume. A perfect README tells recruiters that you have excellent communication skills, empathy for the end-user, and professional standards.
- Saves You Time on Support: When you explain exactly how to install and troubleshoot your project, you stop getting the same basic questions and bug reports over and over again.
How Our README Score Checker Calculates Your Score
There are a few basic grading tools on the internet that count words or check for Markdown formatting. But our tool is different. We built a project-type-aware scoring engine.
A Grunt task runner needs a completely different README than a Next.js Full-Stack template. If a tool grades an API the same way it grades a Desktop App, the score is useless. That is why our analyzer adapts its rules based on what you are actually building.
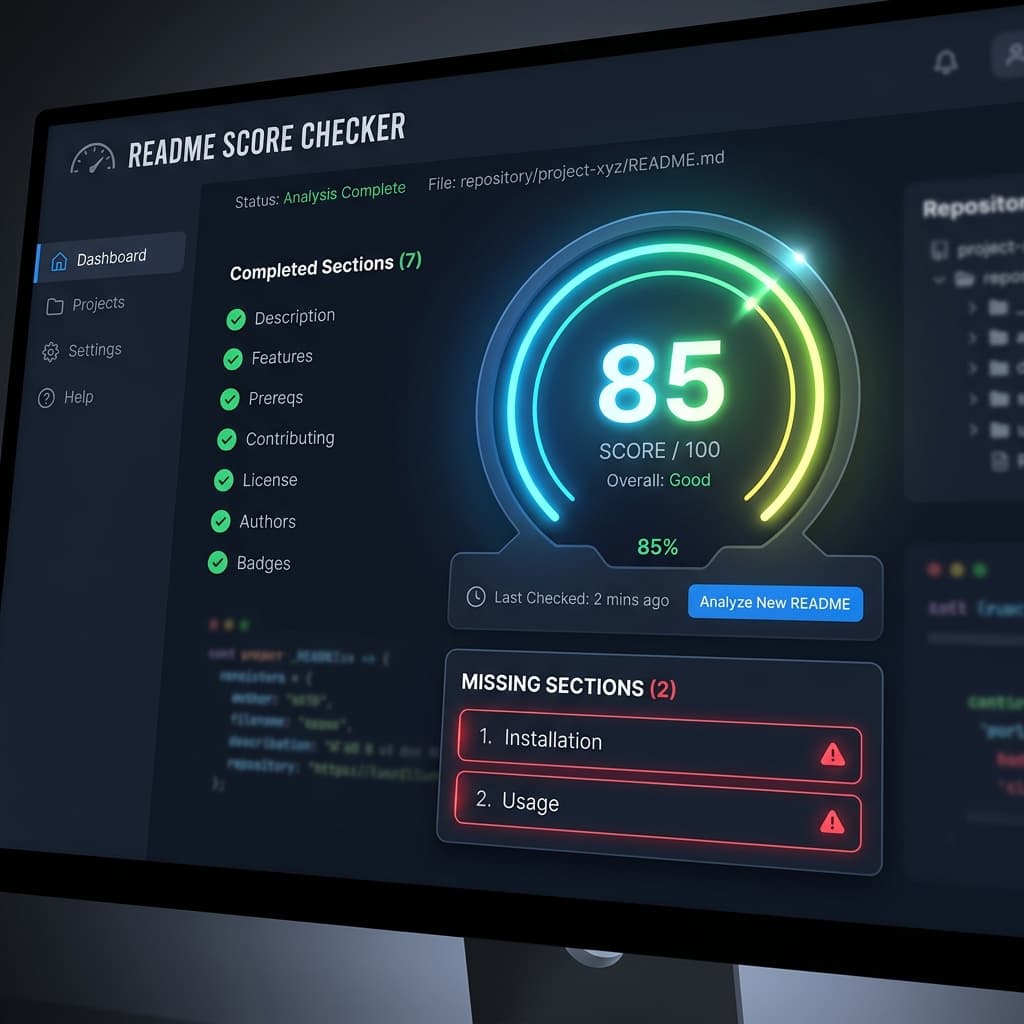
The Score Distribution Breakdown
- Required Sections (Heavy Weight): These are non-negotiable for your project type. For a standard app, things like "Installation", "Usage", and "Description" are heavily weighted. Missing one of these can drop your score significantly (often by 15-20 points each).
- Optional Sections (Bonus Points): Elements like "Badges", "Table of Contents", and "Screenshots" (depending on the project) act as score boosters. They help push a "good" score (like an 85) to a "perfect" 100.
- Contextual Penalties: A UI library loses massive points if it lacks "Screenshots", whereas a Backend API loses points if it lacks "Environment Variables" documentation. We grade you based on what your specific users expect to see.
What to Include in a README? (Must-Have Sections)
Want to know the secret to a perfect README? It comes down to structure. Every great open-source project includes these core sections. Here is exactly what to include and how to write it.
1. A Clear, Catchy Project Title
Always start with a single, massive Header 1 (# Title) at the very top of your document. Give it the real name of your project. Make sure the title is the biggest thing on the page so users immediately know they are in the right place.
How to write it: Keep it to just the name of the project. If you have a logo, place it directly above the title centered. Do not put version numbers in the main title; save that for the badges or releases tab.
2. The Project Description (Elevator Pitch)
Right below the title, write one or two paragraphs that explain what the project is. Avoid dense jargon. What problem does it solve? Why did you build it? What makes it better than the alternatives? Get straight to the point.
How to write it: Start with one clear sentence: "[Project Name] is a [what it does] for [who uses it]." Avoid marketing fluff words like 'powerful', 'revolutionary', or 'simple'. Let the features speak for themselves.
3. Screenshots and Demos
Humans are visual creatures. A wall of text is intimidating, but a nice GIF or screenshot is inviting. Visuals prove that your project actually works and builds immediate trust.
How to write it: Use high-quality WebP or PNG images. If it is a command-line tool, use a tool like Terminalizer to include an animated GIF of the terminal output. Always wrap images in a centered `div` or markdown tag so they do not stretch awkwardly on large monitors.
4. Installation and Getting Started
This is where most projects fail. The installation section must be flawless. Tell them how to clone the repo, how to install dependencies, and how to start the local server.
How to write it: Provide exact, copy-paste-ready commands. Do not write paragraphs of text for instructions. Use Markdown code blocks for every command. If your tool requires global installation or specific OS configurations, separate them clearly under sub-headings (e.g., ### macOS vs ### Windows).
5. Environment Variables and Configuration
Nothing is more frustrating than a project crashing on boot because a hidden `.env` file is missing. If your project connects to a database, uses API keys, or has configurable ports, you must document it.
How to write it: Create a table or list of all variables. State clearly whether they are required or optional. Better yet, include a code block showing exactly what the `.env.example` file should look like:API_KEY=your_stripe_key_here
PORT=3000
6. Usage and Examples
Once the user installs your project, what do they do next? The Usage section should provide basic code examples, command-line arguments, or screenshots showing how to perform the most common tasks.
How to write it: Show the most common "happy path" first. Don't document edge cases here (save that for the Wiki or full docs). Use code blocks with the correct syntax highlighting (e.g., ```javascript) so the code is easy to read.
7. How to Run Tests
A professional README goes the extra mile by including tests and providing examples of how to run them. This proves to contributors that your codebase is stable and sets the standard that new pull requests must pass tests.
How to write it: Keep it brief. "To run the test suite, run npm run test." If there are e2e tests vs unit tests, provide the commands for both.
8. Credits and Acknowledgements
If you worked on the project as a team, or if you relied on amazing open-source libraries to build it, give credit where credit is due.
How to write it: List collaborators with links to their GitHub profiles. Acknowledge any tutorials, articles, or referenced material that helped you build the project. It shows humility and community spirit.
README Template by Project Type
Experts note that if your vision of a perfect README differs greatly from someone else's, it's because projects are vastly different. Here are the ideal structures for the four most common types of repositories.
NPM Package / Library
- 1. Title & Badges (Version, Downloads)
- 2. Brief Description
- 3. Installation (
npm install) - 4. Quick Start Usage
- 5. API Reference (Props/Methods)
- 6. License (Usually MIT)
Full-Stack App
- 1. Title & Logo
- 2. Screenshots / Live Demo Link
- 3. Tech Stack (Next.js, Postgres, etc.)
- 4. Environment Variables
- 5. Run Locally (Database setup)
- 6. Deployment Instructions
CLI Tool
- 1. Title
- 2. Terminal Output GIF
- 3. Installation (Global flag)
- 4. Usage (Commands overview)
- 5. Options / Flags Table
- 6. Contributing
Backend API
- 1. Title & Description
- 2. Base URL & Authentication
- 3. Environment Variables
- 4. API Endpoints Table
- 5. Example Request/Response
- 6. Running Tests
How to Write a README for a GitHub Profile (vs a Project)
Did you know GitHub automatically surfaces a README on your profile page if you create a repository with the exact same name as your username? This is a separate search intent with massive traffic ("github profile readme").
A Project README is strictly about the code: how to install it, use it, and contribute. A Profile README is about you. It acts as your developer portfolio.
For a Profile README, you should ditch the installation instructions and instead include:
- A short bio ("Hi, I'm a frontend developer from London")
- Your current tech stack and skills
- Links to your portfolio, LinkedIn, and Twitter
- Dynamic GitHub Stats (using tools like
github-readme-stats) - A list of your proudest open-source contributions
GitHub README Best Practices and Pro Tips
Use Badges for Instant Credibility
Those little colorful shields at the top of a README are called badges. They provide instant, scannable data about your project's health. Adding a badge that says "build passing," "test coverage 95%," or "MIT License" tells visitors that your project is actively maintained, stable, and safe to use. You can easily generate these using shields.io.
Add a Table of Contents
If your README is longer than a standard web page, you need a Table of Contents. GitHub naturally supports anchor links to headings. A Table of Contents near the top lets users jump straight to the API Reference, the Troubleshooting guide, or the License without having to scroll endlessly.
Write Great Contributing Guidelines
If you want help building your project, you must ask for it clearly. A contributing section should tell users how to fork the repo, create a branch, run tests, and submit a pull request.
Common README Mistakes You Must Avoid
The "Wall of Text"
Nobody wants to read a novel to figure out how to start a dev server. Break your text up. Use bolding to highlight important terms. Use lists and bullet points instead of long paragraphs. Use code blocks for anything that resembles code or a command. Make the document scannable.
Assuming the User Knows Everything
The biggest mistake is the "curse of knowledge." Because you built the project, everything seems obvious to you. You might forget to mention that the user needs Redis installed, or that they must set a specific environment variable before the app will boot. Write your README as if the reader is a junior developer who has never seen your code before.
Forgetting the License
If you do not include a license, your code is under exclusive copyright by default. This means nobody is legally allowed to use, copy, modify, or distribute your software. Always put a "License" section at the very bottom of your README.
README Markdown Cheat Sheet
Need a quick reference for writing your documentation? Here is a cheat sheet of the most commonly used GitHub Flavored Markdown (GFM) syntax for READMEs.
| Element | Markdown Syntax | Output Example |
|---|---|---|
| Headings | # H1 | H1, H2, H3 |
| Bold Text | **Important Note** | Important Note |
| Code Block | ```bash | npm install |
| Links | [Visit Site](https://example.com) | Visit Site |
| Images |  | [Image appears here] |
| Collapsible Section | <details> | Click to expand (native HTML) |
Frequently Asked Questions About GitHub READMEs
Does the length of my README matter?
Quality is more important than length. A tiny, single-purpose script might only need a 50-word README with one install command. A massive web framework might need thousands of words. As long as you cover the essential questions (What is it? How do I install it? How do I use it?), the exact length does not matter.
Do I need different README templates for different projects?
Yes! A library meant to be installed via npm needs a very different README than a full-stack SaaS application that gets deployed to AWS. A library needs deep API references, while an application needs robust local setup and deployment instructions. Always tailor your sections to the audience who will actually be using the code.
How often should I update my README?
Your README should be updated every single time you change how the project is installed, configured, or used. Treat your documentation exactly like your code: if the code changes, the docs must change with it.
Ready to test your project?
Scroll back up and paste your README into the Score Checker to see how you rank!