How to Show a File Tree in a GitHub README (With Examples and Tools)
Learn how to create and add a file tree to a GitHub README. See real examples, project structure best practices, Markdown file trees, Mermaid diagrams, and tools that generate repository structures automatically.
Why GitHub Repositories Need a File Tree
When someone opens a GitHub repository for the first time, one of the first things they try to understand is the project structure. Before reading the code, they want to know where important files are located and how the project is organized.
This is where a file tree becomes useful. A file tree provides a clear overview of folders and files, making it easier to understand the structure of a repository without clicking through every directory. In large projects, this can save a significant amount of time.
Many open-source projects include a file tree in their README because it helps contributors quickly understand the codebase. Instead of guessing where components, routes, APIs, assets, or configuration files are stored, developers can see the entire structure at a glance.
For example, if you are working with a React or Next.js project, a file tree can immediately show where pages, components, hooks, utilities, and public assets are located. This makes onboarding easier for new contributors and improves project documentation.
If you already have a repository and want to generate a visual structure automatically, you can try the GitHub File Tree Visualizer. You can also use the File Tree Exporter to convert project structures into Markdown, Mermaid diagrams, SVG, PNG, and PDF formats.
Before creating one, it helps to understand what a file tree actually represents and why it has become a standard part of modern project documentation.
What Is a File Tree?
A file tree is a visual representation of a project's folder and file structure. It shows how directories are organized and how files are nested inside those directories. Instead of opening folders one by one, you can view the entire structure in a single place.
Developers often use file trees in GitHub README files, project documentation, tutorials, and technical guides because they provide a quick overview of a repository. A well-organized file tree makes it easier for others to understand how a project is structured before they start reading the code.
For example, a simple Next.js project might look like this:
my-project/
├── app/
│   ├── layout.js
│   └── page.js
├── components/
│   ├── Navbar.jsx
│   └── Footer.jsx
├── public/
│   └── logo.png
├── package.json
└── README.md
Even without opening the repository, you can immediately understand where pages, reusable components, assets, and configuration files are located.
There are several ways to represent a file tree. Some developers prefer a traditional text-based tree, while others use visual formats such as Mermaid diagrams or exported SVG and PNG images. The format usually depends on where the structure will be shared.
If you need to create a project structure from scratch, you can use the File Tree Generator. If you already have a repository and want to analyze its structure, the GitHub File Tree Visualizer can generate a tree directly from a GitHub repository.
Now that you understand what a file tree is, let's look at a real example of how file trees are commonly used in GitHub repositories.
Example of a GitHub Repository File Tree
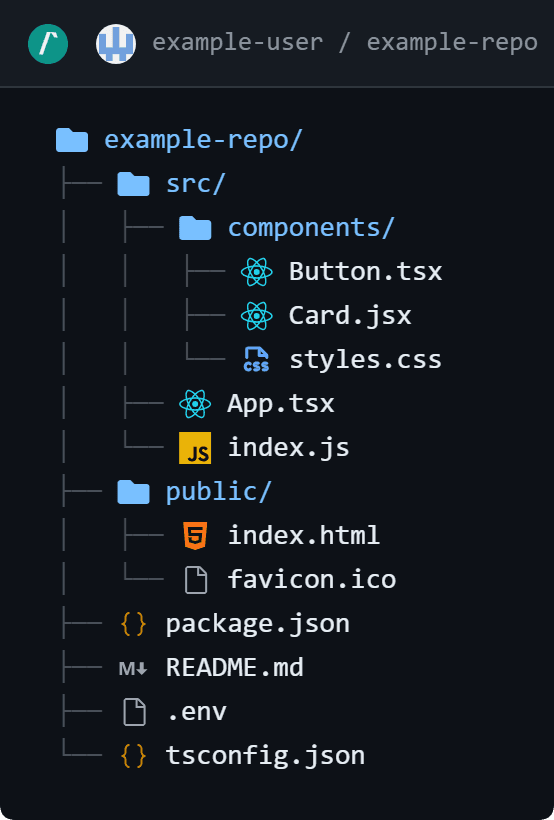
It is easier to understand a file tree when you see it in a real project. Most GitHub repositories follow a structure that separates application code, assets, configuration files, and documentation into different folders.
For example, a typical Next.js project structure might look like this:
my-project/
├── app/
│   ├── layout.js
│   ├── page.js
│   └── dashboard/
├── components/
│   ├── Navbar.jsx
│   ├── Sidebar.jsx
│   └── Footer.jsx
├── public/
│   ├── images/
│   └── favicon.ico
├── lib/
├── package.json
├── next.config.js
└── README.md
Even a simple structure like this provides useful information. A developer can quickly identify where pages are located, where reusable components live, and which files control project configuration.
This is why many open-source maintainers include a GitHub file tree inside their README. New contributors can understand the layout of the repository without opening every folder individually.
A documented folder structure is especially helpful for larger projects where the number of files grows over time. It reduces confusion and helps developers locate important files more quickly.
If you already have a repository, you can use the GitHub File Tree Visualizer to generate a visual representation of the repository structure. You can then export it as Markdown, Mermaid, SVG, PNG, or PDF using the File Tree Exporter.
Of course, not everyone creates a file tree manually. In the next section, we will look at how developers traditionally build file trees and why that process can become time-consuming for larger repositories.
How to Create a File Tree Manually
One way to create a file tree is to write the project structure manually using indentation and tree characters. Many developers use this approach when documenting a GitHub repository or adding a project structure to a README file.
A simple example looks like this:
src/
├── components/
│   ├── Navbar.jsx
│   └── Footer.jsx
├── pages/
│   └── Home.jsx
└── utils/
    └── helpers.js
For smaller projects, manually creating a tree is usually straightforward. You can type the structure yourself or generate it using the terminal and then paste the result into your documentation.
This works well when the project contains only a few folders and files. The structure is easy to read, easy to update, and can be added directly to GitHub README files, tutorials, and technical documentation.
The challenge appears when the project starts growing. A single folder might contain multiple nested directories, configuration files, assets, and source code files. Keeping the tree updated becomes another task that needs maintenance.
For active projects, even small changes such as renaming a folder or moving a file can make the documented folder structure outdated. This is why many developers eventually switch to tools that generate and maintain the structure automatically.
Some developers prefer building the structure visually instead of writing tree characters manually. In that case, a File Tree Generator can make it easier to create, edit, and organize folders before exporting the final structure.
Problems with Creating File Trees Manually
Manually creating a file tree works well for small projects, but it becomes difficult to maintain as a repository grows. Every time a folder is renamed, moved, or deleted, the documented structure needs to be updated as well.
This might not seem like a problem at first, but larger repositories often contain dozens of folders and hundreds of files. Even a small change can leave the documented project structure outdated.
Another common issue is formatting. Different developers use different indentation styles, spacing, and tree characters. As a result, the same repository can be documented in several inconsistent ways.
For open-source projects, an outdated GitHub file tree can be confusing for contributors. A README may show one structure while the actual repository contains something completely different.
Keeping a file tree accurate becomes even harder when working with actively maintained projects. New components, pages, APIs, assets, and configuration files are added regularly, which means the structure needs continuous updates.
Because of this, many developers prefer generating the structure directly from a repository or building it using tools that can update and export the tree automatically.
If you already have a GitHub repository, using a GitHub File Tree Visualizer can save time by generating the structure directly from the repository instead of maintaining it by hand.
How to Generate a File Tree Automatically
As projects grow, manually maintaining a file tree becomes less practical. Every new folder, renamed file, or project reorganization requires updating the documented structure as well.
A more reliable approach is to generate the structure automatically from the repository itself. This ensures the documented folder structure stays consistent with the actual project and reduces the chance of outdated documentation.
Many developers use terminal commands to generate a directory tree, while others prefer visual tools that can read a repository and build the structure automatically. The advantage of automated generation is that the tree always reflects the current state of the project.
For example, instead of manually writing:
src/
├── components/
├── pages/
├── utils/
└── styles/
A generator can scan the repository and create the structure for you in seconds.
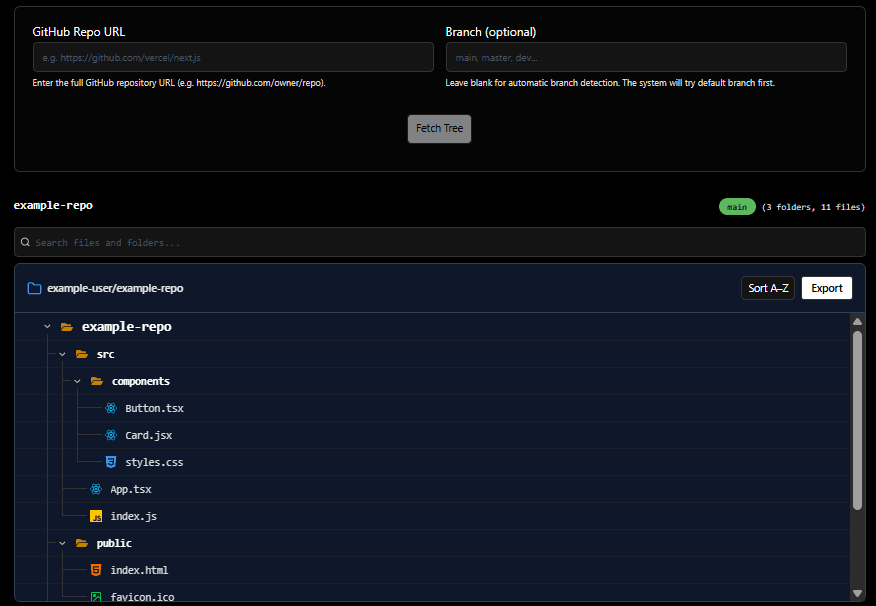
If you want to generate a tree directly from a repository, the GitHub File Tree Visualizer can load both public and private repositories and display the structure in a visual format similar to a code editor.
Unlike a traditional text-based tree, a visual explorer makes it easier to browse folders, search for files, inspect repository details, and navigate directly to files on GitHub when needed.
Once the structure is generated, it can be copied or exported for documentation, README files, tutorials, and project guides.
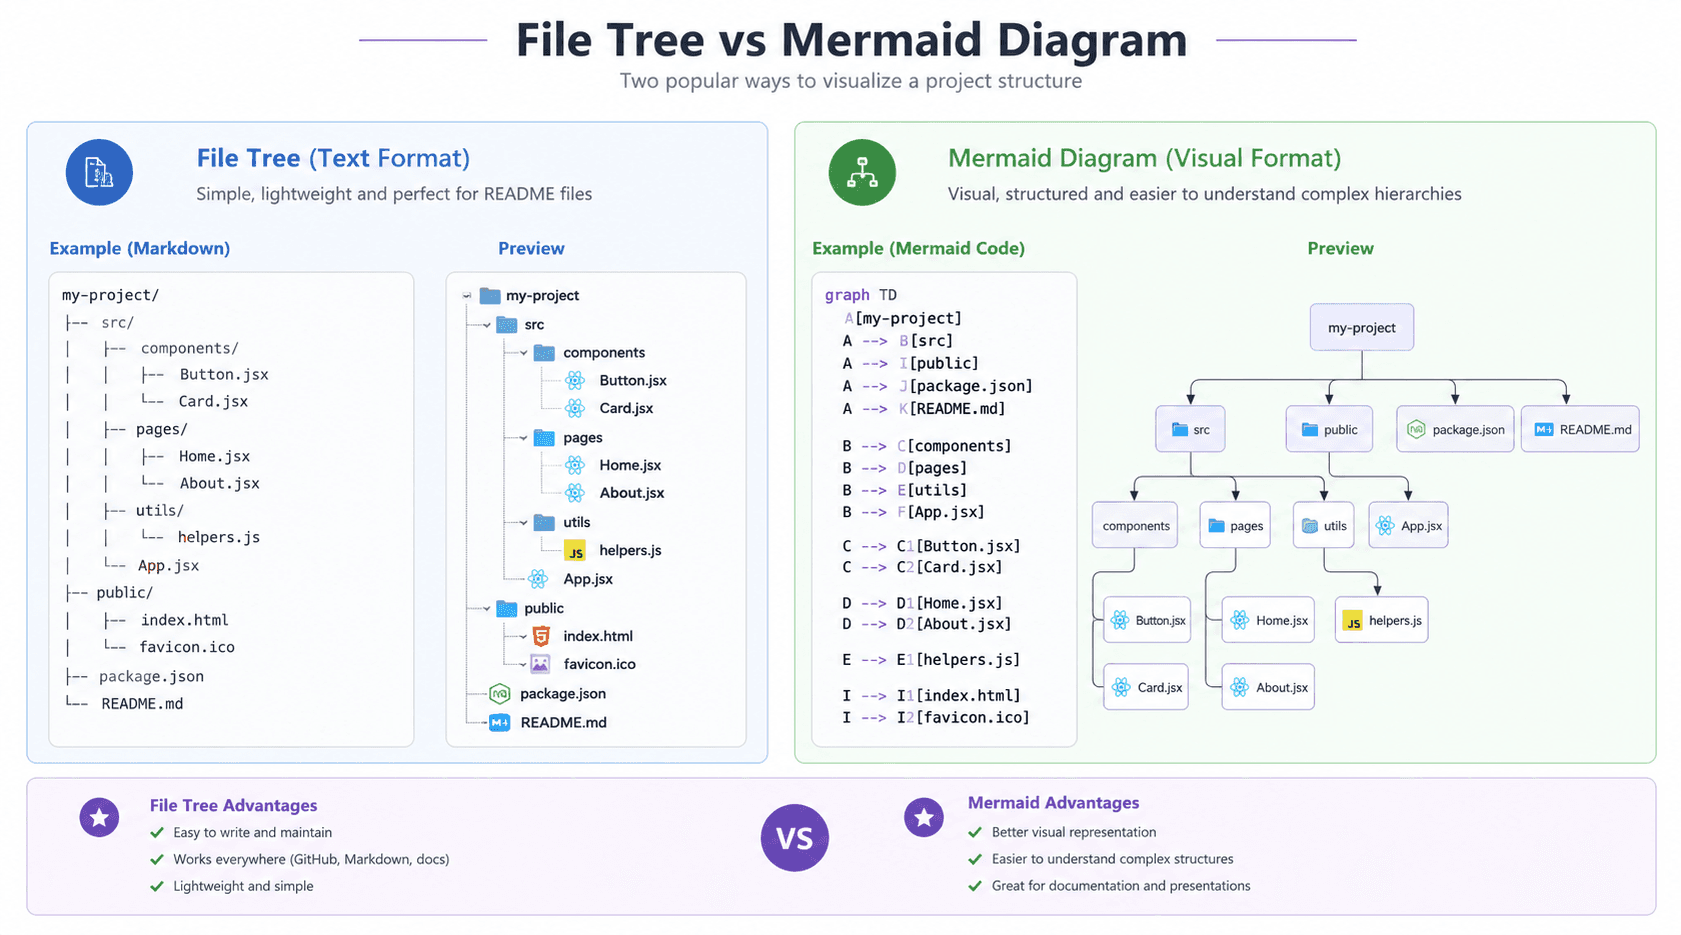
Text Tree vs Mermaid Diagram
When documenting a project structure, developers usually choose between a traditional text-based file tree and a visual diagram. Both approaches have their advantages, and the right choice depends on where the structure will be shared.
Text Tree
A text tree is the most common format used in GitHub README files. It is simple, lightweight, and easy to copy into Markdown documents.
src/
├── components/
├── pages/
├── utils/
└── styles/
Because it uses plain text, it works on almost every platform and can be viewed without additional tools.
Mermaid Diagram
A Mermaid diagram represents the same structure in a more visual format. Instead of reading indentation levels, users can see relationships between folders and files through a rendered diagram.
graph TD
    src --> components
    src --> pages
    src --> utils
    src --> styles
This format is often used in technical documentation, architecture guides, and internal team documentation where visual explanations are preferred.
Which Format Should You Use?
For most GitHub README files, a file tree is usually the better choice because it is compact and familiar to developers.
For presentations, architecture documentation, onboarding guides, and technical reports, a Mermaid diagram can make complex structures easier to understand.
Many teams use both formats. A text tree provides a quick overview, while a Mermaid diagram offers a more visual representation of the same structure.
If you need both formats, the File Tree Exporter can generate Markdown trees, Mermaid diagrams, SVG images, PNG images, and PDF exports from the same project structure.
When to Add a File Tree to a GitHub README
Not every repository needs a file tree, but for many projects it can make the documentation easier to understand. A well-placed project structure helps readers quickly see how the repository is organized before they start exploring the code.
This is especially useful for open-source projects where contributors may be visiting the repository for the first time. Instead of clicking through multiple folders, they can understand the layout in a few seconds.
Large Projects
If your repository contains multiple folders, features, modules, or applications, adding a project structure can help users find important files faster.
Examples include:
- React applications
- Next.js projects
- Node.js backends
- Python applications
- Monorepos
Tutorial Repositories
Tutorials often reference folders and files throughout the guide. Including a file tree at the beginning helps readers follow instructions without guessing where files should be created.
Open Source Projects
Contributors frequently want to know where components, APIs, utilities, assets, and configuration files are located. A documented folder structure provides a quick overview and reduces confusion.
When You Can Skip It
For very small repositories, a file tree may not add much value. If the project contains only a handful of files, the repository structure is already easy to understand directly from GitHub.
The goal is not to add a file tree to every repository. The goal is to make the project easier to navigate. If the structure helps readers understand the repository faster, it is usually worth including.
Many developers place the file tree near the installation or getting started section so new users can understand the repository layout before diving into the code.
Common Mistakes When Documenting Project Structure
Adding a file tree to a README can be helpful, but a poorly maintained structure can create confusion instead of improving documentation. Here are some common mistakes developers make when documenting a repository.
Using an Outdated File Tree
One of the most common issues is forgetting to update the structure after the project changes. New folders are added, files are moved, and old directories are removed, but the README still shows the original layout.
An outdated GitHub repository structure can mislead contributors and make it harder to find important files.
Showing Too Much Detail
Not every file needs to be included. Some repositories contain hundreds of files, and displaying everything can make the structure difficult to read.
In many cases, showing the main folders and important files provides a better overview than listing every file in the repository.
Ignoring Important Folders
The opposite problem is removing too much information. If important directories such as components, pages, APIs, or configuration files are missing, readers may not understand how the project is organized.
Using Inconsistent Formatting
A folder structure should be easy to scan. Inconsistent spacing, indentation, or tree characters can make the hierarchy difficult to follow.
Keeping the format clean and consistent improves readability and makes the documentation look more professional.
Not Linking to Additional Documentation
A file tree provides an overview of the project, but it does not explain what every folder does. For larger repositories, it is often helpful to link important directories to separate documentation pages or guides.
The best documentation combines a clear project structure with explanations of key folders, modules, and features.
Choosing the Wrong Format
Different situations require different formats. A text tree is often enough for a GitHub README, while a Mermaid diagram or exported image may work better for presentations, tutorials, and technical documentation.
The goal is not to create the most detailed structure possible. The goal is to help readers understand the repository quickly and find the files they need.
Making Project Structures Easier to Read
Traditional text trees are useful, but they are not the only option. Visual file trees can make large repositories easier to explore by displaying folders, files, and file-type icons in a familiar interface similar to a code editor.
This can be particularly helpful when documenting repositories that contain many folders or different technologies. Instead of seeing only file names, readers can quickly recognize components, configuration files, assets, and source code based on their icons.
If you need to share the structure outside GitHub, the same tree can also be exported as Markdown, Mermaid diagrams, SVG images, PNG images, or PDF documents while preserving a clean and organized layout.
Choosing the Right File Tree Tool
Different projects require different workflows. Some developers prefer building a structure manually, while others want to generate it directly from a repository or export it in multiple formats.
Create a File Tree Manually
If you want to build a project structure from scratch, add folders and files yourself, and organize the hierarchy visually, try the File Tree Generator.
Generate a Tree from a GitHub Repository
If the repository already exists on GitHub, the GitHub File Tree Visualizer can generate the structure automatically from a repository URL and help you explore folders, files, and repository details.
Edit Complex Project Structures
For larger projects, the Create Folder Structure provides a visual editor with drag-and-drop support, hierarchy lines, folder management, imports, exports, and additional editing tools.
Export a File Tree in Multiple Formats
If you already have a file tree and need it in a different format, the GitHub File Tree to PNG can convert it into Markdown, Mermaid diagrams, SVG, PNG, and PDF formats with visual files and folder icons.
Embed a Live File Tree in Your README
If you want your repository's structure to automatically update whenever you push new files, we have created the Dynamic GitHub File Tree Embed tool! It generates a live, auto-theming SVG image link that you can drop directly into any GitHub README.md, so you never have to manually update your documented structure again.
The best tool depends on your workflow. Some developers start by generating a structure from GitHub, others prefer building it manually, and many export the final result for documentation, README files, tutorials, and presentations.